Table of Contents
A well-designed before and after photo gallery is one of the most powerful tools your practice can use to attract new patients, build trust, and convert consultations into bookings. Whether you’re a medspa, dermatology clinic, or plastic surgery practice, the way you showcase your results online directly impacts how prospective patients perceive your expertise.
But not all galleries are created equal. Some are clunky, outdated, or hidden deep in a website menu. Others overwhelm visitors with unorganized or inconsistent photos. The difference between a gallery that looks nice and a gallery that drives revenue lies in how strategically it’s built.
In this blog, we’ll break down the essential elements of a high-converting before-and-after photo gallery and show you how to structure yours for maximum impact!
Why Your Website Gallery Matters
Today’s patients want proof before they commit. Surveys consistently show that before-and-after photos are one of the top deciding factors when choosing a provider. A gallery isn’t just a place to display your work, it’s a sales tool!
A strong gallery should:
- Showcase the quality and consistency of your results.
- Build credibility and trust through authentic patient transformations.
- Help patients visualize their own potential outcomes.
- Encourage conversions by reducing uncertainty.
When done right, your gallery becomes a silent but persuasive member of your sales team.
Step 1: Focus on Consistency in Photography
The foundation of any great gallery is the photography itself. Consistent, professional-quality images allow patients to compare results clearly without distraction.
Tips for consistent photos:
- Use the same background and lighting for every image.
- Capture the same angles pre- and post-treatment (e.g., front, left profile, right profile).
- Standardize patient positioning with guides or overlays to ensure alignment.
- Avoid clutter by keeping the focus solely on the treatment area.
When every photo looks uniform, visitors can focus on the transformation, not the photography.
Step 2: Organize by Treatment and Concern
A high-converting gallery is easy to navigate. Prospective patients don’t want to scroll endlessly to find what they’re looking for — they want to see their concern addressed quickly.
Best practices for organization:
- Create folders or categories for each treatment type (e.g., injectables, skin resurfacing, body contouring).
- Add subcategories for specific concerns (e.g., lips, crow’s feet, acne scars).
- Use clear, patient-friendly labels — avoid technical jargon that might confuse non-clinical readers.
This structure reduces friction and helps patients find relatable results instantly, increasing the chance they’ll book a consultation.
Step 3: Protect and Brand Your Images
Your gallery is an extension of your brand. Protecting your intellectual property while ensuring your results look professional is crucial.
Consider:
- Watermarks: Add your logo or practice name to each image to discourage unauthorized use.
- Age/content warnings: Sensitive procedures (such as breast or intimate treatments) should be protected with content gates to respect patients and meet compliance standards.
- Consistent branding: Match colors, fonts, and gallery layout to your practice’s overall website design for a seamless experience.
Patients should recognize immediately that they’re viewing results from your practice.

How to Build a High-Converting Aesthetic Gallery
Learn what makes a before & after gallery actually convert! Check our free guide!
Step 4: Make It Interactive and Engaging
Static before-and-after photos work, but interactive tools can dramatically enhance engagement and conversion. By allowing patients to experience the transformation, you deepen their connection to your work.
High-performing gallery features include:
- Sliders: Let visitors drag a slider across the image to compare before and after in real time.
- Side-by-side views: Position images directly next to each other for quick comparison.
- Animations or ghosting: Overlay images for subtle but powerful effect.
These features aren’t just “cool add-ons.” They help patients visualize progress more clearly, reducing hesitation and boosting their confidence to say yes.
Step 5: Keep Your Gallery Fresh
An outdated gallery filled with old results can send the wrong message. Patients want to see recent, relevant transformations that reflect your current techniques and expertise.
Tips for staying current:
- Add new photos regularly (at least monthly).
- Remove outdated or lower-quality images.
- Highlight seasonal treatments when relevant (e.g., body contouring in summer, skin resurfacing in winter).
A fresh gallery signals that your practice is active, modern, and continuously delivering great results.
Step 6: Ensure Easy Website Integration
The best gallery is the one patients can actually find and use. If your gallery lives in a hidden app or behind multiple clicks, you’re missing opportunities.
Best practices for placement:
- Add “Before & After Gallery” to your main navigation.
- Include gallery links in service pages (e.g., “See real results from Botox treatments here”).
- Make sure it works seamlessly across desktop and mobile devices.
Seamless website integration is what transforms a gallery from a “nice-to-have” into a patient acquisition tool.
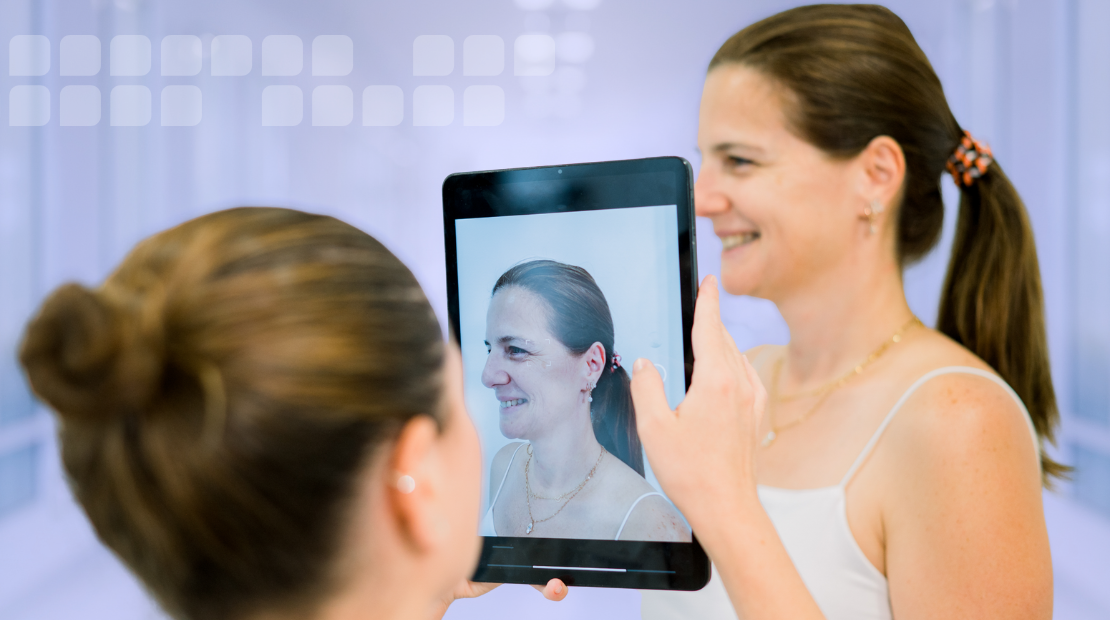
Step 7: Use Your Gallery in Consultations
A gallery isn’t just for your website — it’s also a powerful tool during face-to-face consultations. Showing patients real results on the spot builds trust and validates your recommendations.
How to use galleries in consultations:
- Pull up relevant before-and-after photos for the treatment they’re considering.
- Use sliders or comparisons to highlight realistic outcomes.
- Encourage patients to ask questions while viewing results.
When patients can see proof tailored to their own concerns, they’re more likely to commit.
Step 8: Track Performance and Adjust
Like any marketing tool, your gallery should be evaluated and optimized over time.
Metrics to watch:
- Page visits and time on page.
- Click-throughs from service pages to galleries.
- Consultation requests directly after gallery views.
Adjust your gallery structure or highlight specific treatments based on performance data.
Bringing It All Together
Creating a high-converting photo gallery requires more than just uploading pictures, it’s about strategy. From consistent photography to smart organization, branding, interactivity, and integration, each element works together to build trust and encourage bookings.
The good news is that the technology now exists to make this process simple. Tools like RxPhoto Galleries were built with these exact principles in mind: automatic syncing to your website, HIPAA-compliant organization, interactive features like sliders and side-by-sides, and easy use in consultations.
By applying the steps above and using the right solution to simplify the process, your gallery can go from being an overlooked page on your website to one of your most effective conversion drivers! Schedule your free demo today!