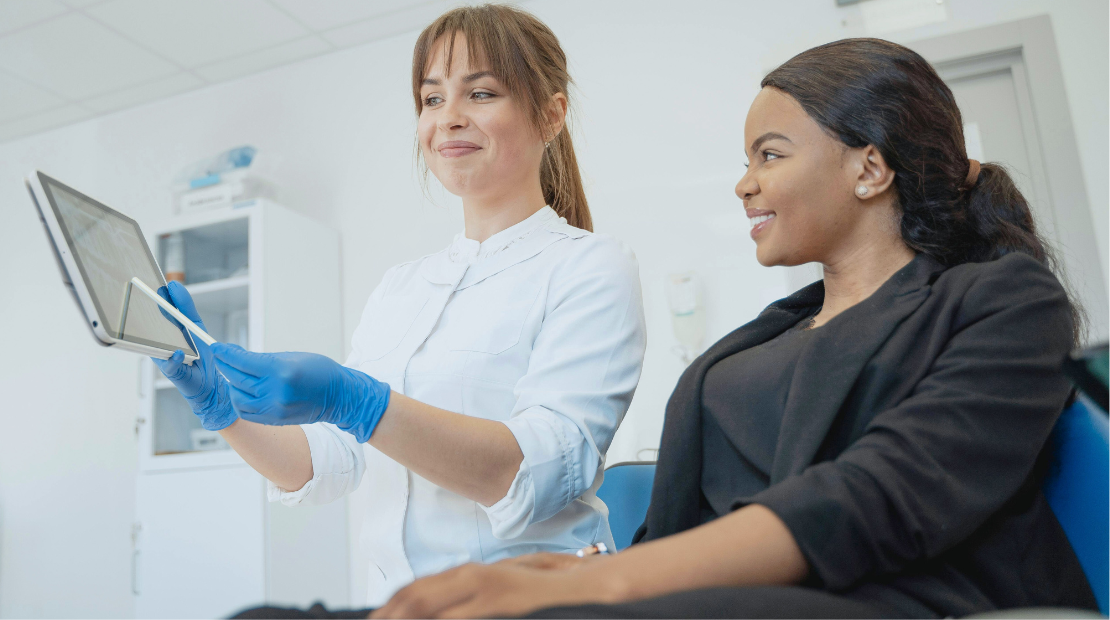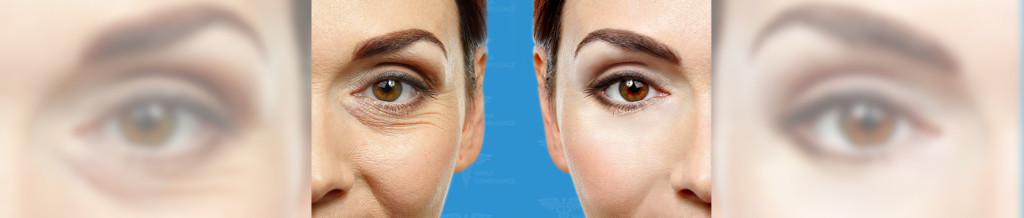
Consistent, high quality before and after photos are absolutely essential for a successful plastic surgery practice. Medical photography is the most detailed form of documentation and also serves as a way to increase client satisfaction and loyalty. Additionally, high quality medical photography can be used to educate the public as well as attract new patients through marketing and social media. Plastic surgery practices must have impressive before and after galleries on their websites to entice new clientele. Gone are the days of a single photo room, complete with synchronized flashes and a pre-programmed DSLR. The latest iPhones and iPads have 12 megapixel cameras, which take excellent high-resolution photos consistently. Before smart phones, before and after photos would not always happen because there was only one medical photography room, and if it was occupied, time was wasted waiting. With RxPhoto in conjunction with iPhones or iPads, every clinic room can become a plastic surgery medical photography room. Every patient should, and can, have medical photography in their chart, complete with before and afters, without fail.
Equipment:
- Full length mirror
- Curtain rod
- Blue sheet
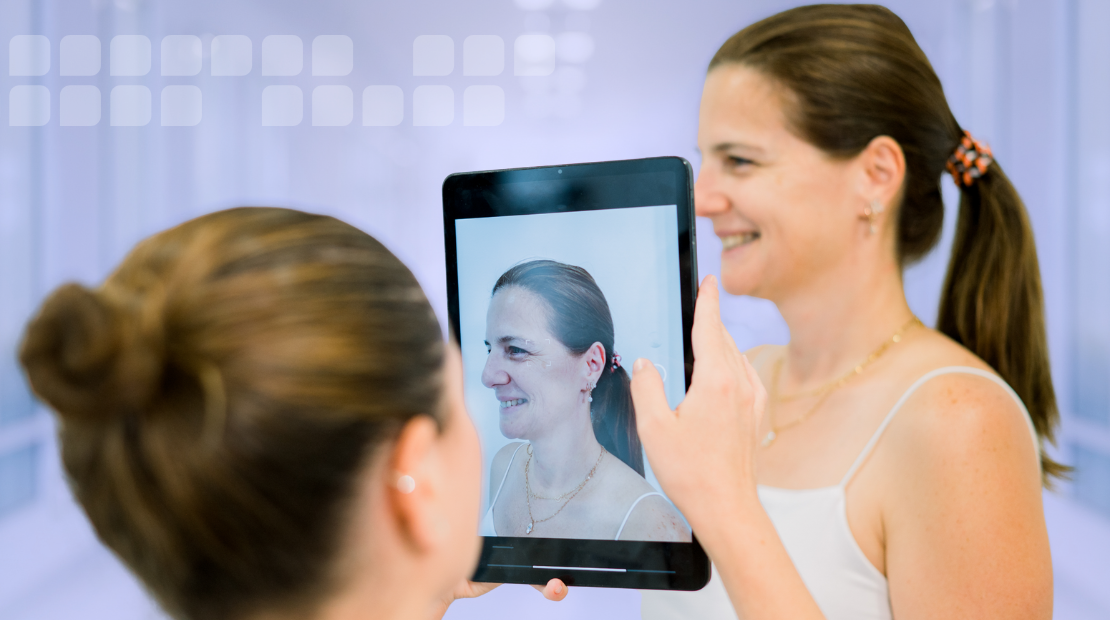
- iPhone/iPad with RxPhoto app
- An employee with a pulse

Lighting: The most important aspect of lighting is consistency. During medical photography, keep the natural light blocked out in all clinic rooms. For example, if a patient comes in the morning for their first appointment, and the after photos are taken a couple weeks later in the afternoon, the natural lighting will look different. The same goes for winter and summer appointments. To avoid variables, keep natural light blocked out. Also, if the room is well-lit, a camera flash is not necessary. Camera flashes often create harsh and uneven shadowing on facial portraits.
Setup:
- Hang the full-length mirror, rod, and curtain
- If there are windows in the room, either install shutters or hang a curtain to block the natural light
- Download the RxPhoto app
- Have all employees practice taking photos on each other to perfect poses, angles, and get a steady hand.
Getting Started: Most employees will already have experience taking photos on their iPhones outside of work, so they will be very comfortable learning how to use RxPhoto in the practice. With facial medical photography, take photos of the patient making various facial expressions. For example, with Botox patients, take one photo with the face at rest, one with the eyebrows lifted (creating the horizontal forehead creases), one with them frowning (creating the glabellar frown lines), and one with them smiling as big as they can (making the crow’s feet pop). With all patients, take photos straight on, at each 45 degree angle, and from each side. Practice makes perfect. Dedicate a day to staff training and evaluate every employee’s ability to take consistent medical photography. Your patients will love seeing their results. This is a small investment that will reap great rewards in the future.
Are you struggling to take high-quality and consistent before and after photos?
Check out our whitepaper on
Lindsay Van Meter
Lindsay Van Meter, RN, BSN, CNOR, CANS